Basic Features / Controls / Navigation
To manually turn on the diagnostic tool, press and release the Power button  .
.
The diagnostic tool will automatically turn on when:
| ● | a live AC power supply is connected to the diagnostic tool |
Never connect the AC power supply adapter, or optional power cable to the diagnostic tool when communicating with a vehicle.
| ● | the Data Cable is connected to a vehicle (that has 12VDC at the data link connector (DLC)) |
Power may be supplied by any one of the following:
| ● | Charged internal battery pack |
| ● | Live AC power supply (charging internal battery) |
| ● | The vehicle data link connector (DLC) (diagnostic tool data cable connected) |
All vehicle communication must be stopped BEFORE turning off the diagnostic tool. A warning message displays if you attempt to turn the diagnostic tool off while communicating with the vehicle. Forcing a shut down while communicating may lead to ECM problems on some vehicles. Never disconnect the Data Cable when the diagnostic tool is communicating with the vehicle ECM.
| 1. | Exit all functions and communication with the vehicle. |
| 2. | Follow all screen prompts, to exit functions. |
| 3. | Press and release the Power button  . . |
Using the emergency shutdown procedure while communicating with the vehicle ECM may lead to ECM problems on some vehicles.
During normal operation turn the diagnostic tool off using the Turning Off procedure above. The emergency shutdown procedure should only be used If the diagnostic tool does not respond to navigation or control buttons or exhibits erratic operation. To force an emergency shutdown, press and hold the Power button  for five seconds until the diagnostic tool turns off.
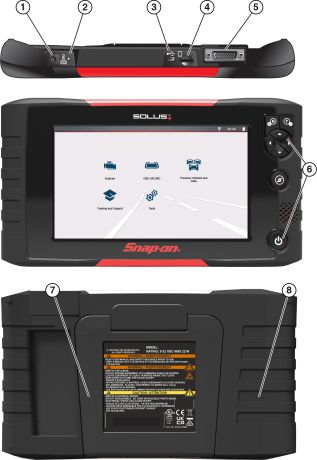
There are four “push type” control buttons and one “thumb pad rocker type” multi-directional button located on the right side of the diagnostic tool. All other diagnostic tool operations are controlled through the touch screen.
Touch screen controls are used for most operations, however the control buttons may also be used to navigate and select functions.
Item | Button | Description | |
|---|---|---|---|
1 | – | Power Supply Jack |
|
2 | – | Battery Status Indicator LED | |
3 | – | Mini USB Jack | |
4 | – | Micro secure digital (uSD) Card | |
5 | – | Data Cable Connector | |
6 |
| N/Cancel | |
| Y/Accept | ||
| Directional Buttons | ||
| S (Shortcut) | ||
| Power (On/Off) | ||
7 | – | Fold out Stand | |
8 | – | Battery Cover | |
The Home screen includes a title bar and main body. The Home screen contains the primary diagnostic tool function icons.
Common Title Bar Icons / Indicators
| 1. | Vehicle data link connector voltage |
| 2. | Active vehicle communication status |
| 3. | Wi-Fi connection status |
| 4. | Time of day |
| 5. | Battery charge level and power connection status |
Icon | Function | Icon | Function |
| Full Battery Charge Level |
| External Power Connected |
| Low Battery Charge Level |
| Wi-Fi Signal Strength |
| Software Update Downloading |
| Software Update Ready To Install |
| Software Update Download Error |
|
|
Name | Icon | Description |
Scanner |
| Allows you to retrieve diagnostic trouble codes |
OBD-II/EOBD |
| Allows you to access generic OBD-II/EOBD data and tests without identifying the vehicle being tested. |
Previous |
| Allows you to quickly reconfigure the diagnostic tool to a recently tested vehicle and to access saved data files. |
Training and Support |
| Training and Support provides information on how to setup and get started using select features of your diagnostic tool. |
Tools |
| Allows you to adjust diagnostic tool settings to your personal preferences and perform other special functions. |
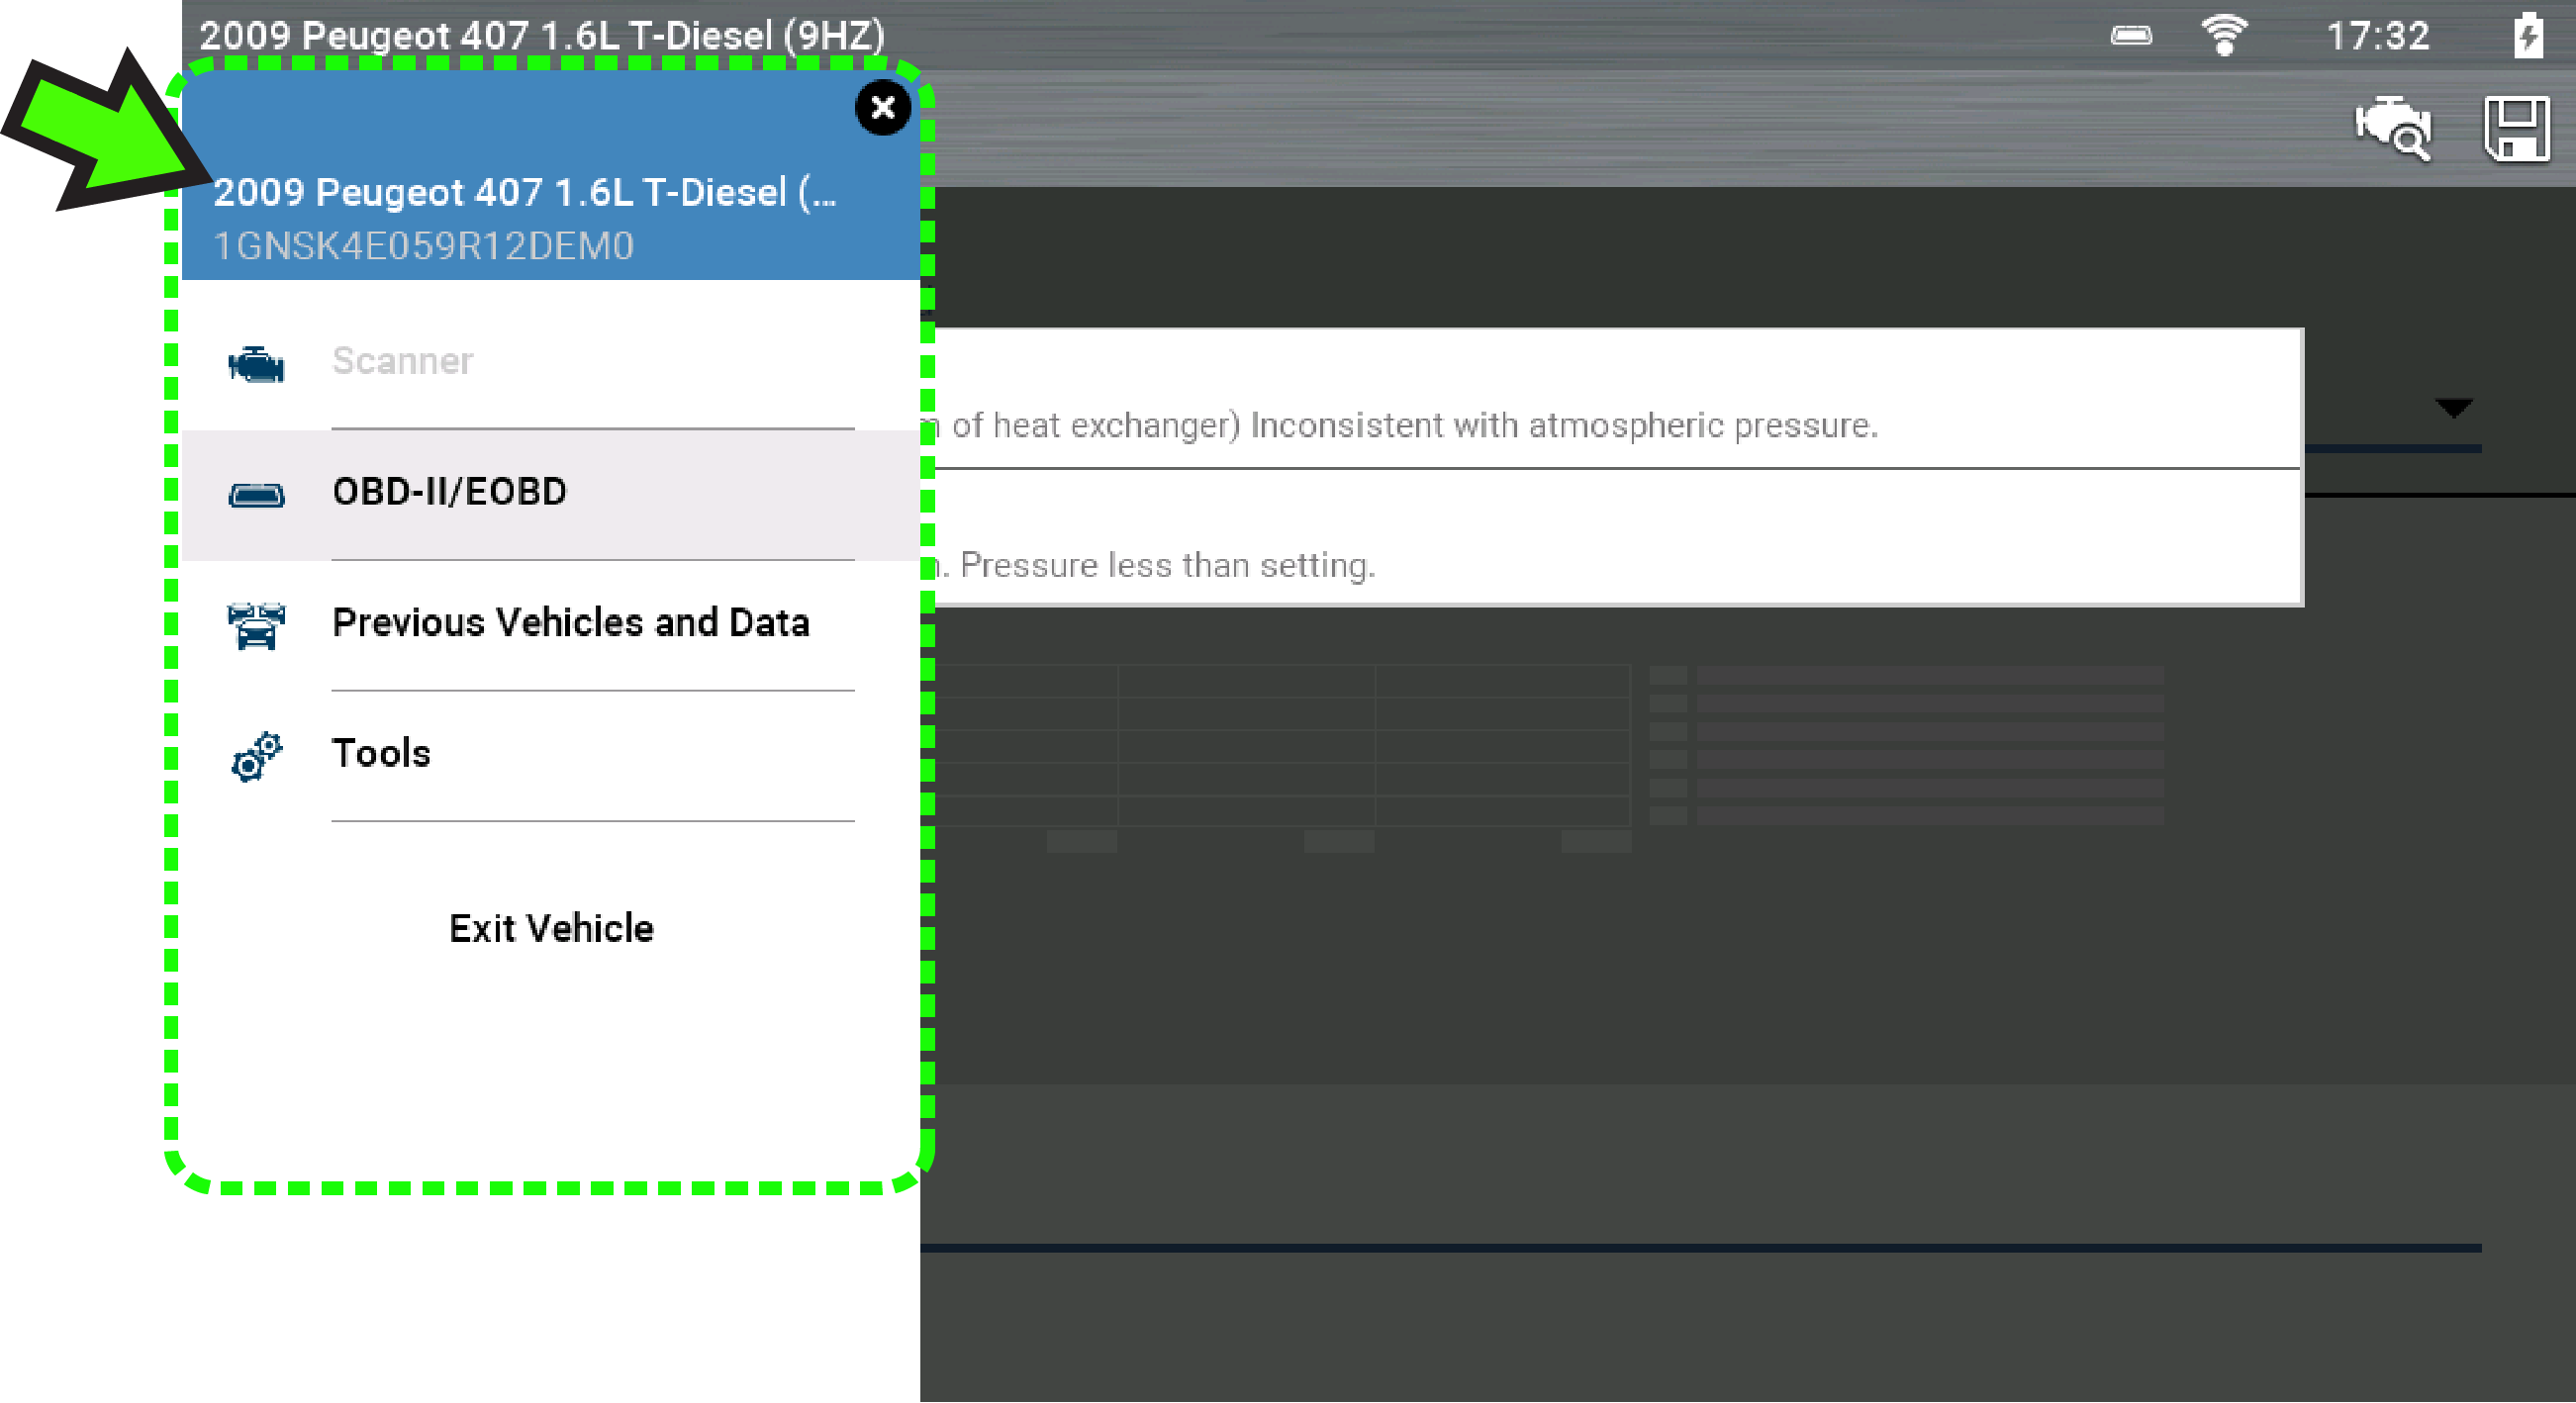
Use the Quick-Access Menu as a shortcut to “jump” between functions, or to Exit the active vehicle. This menu is available within most functions (after identifying a vehicle), and is application sensitive (provides only applicable links based on your location in the software).
Selecting the Home icon ![]() opens the Quick-Access Menu, depending on your location in the software.
opens the Quick-Access Menu, depending on your location in the software.
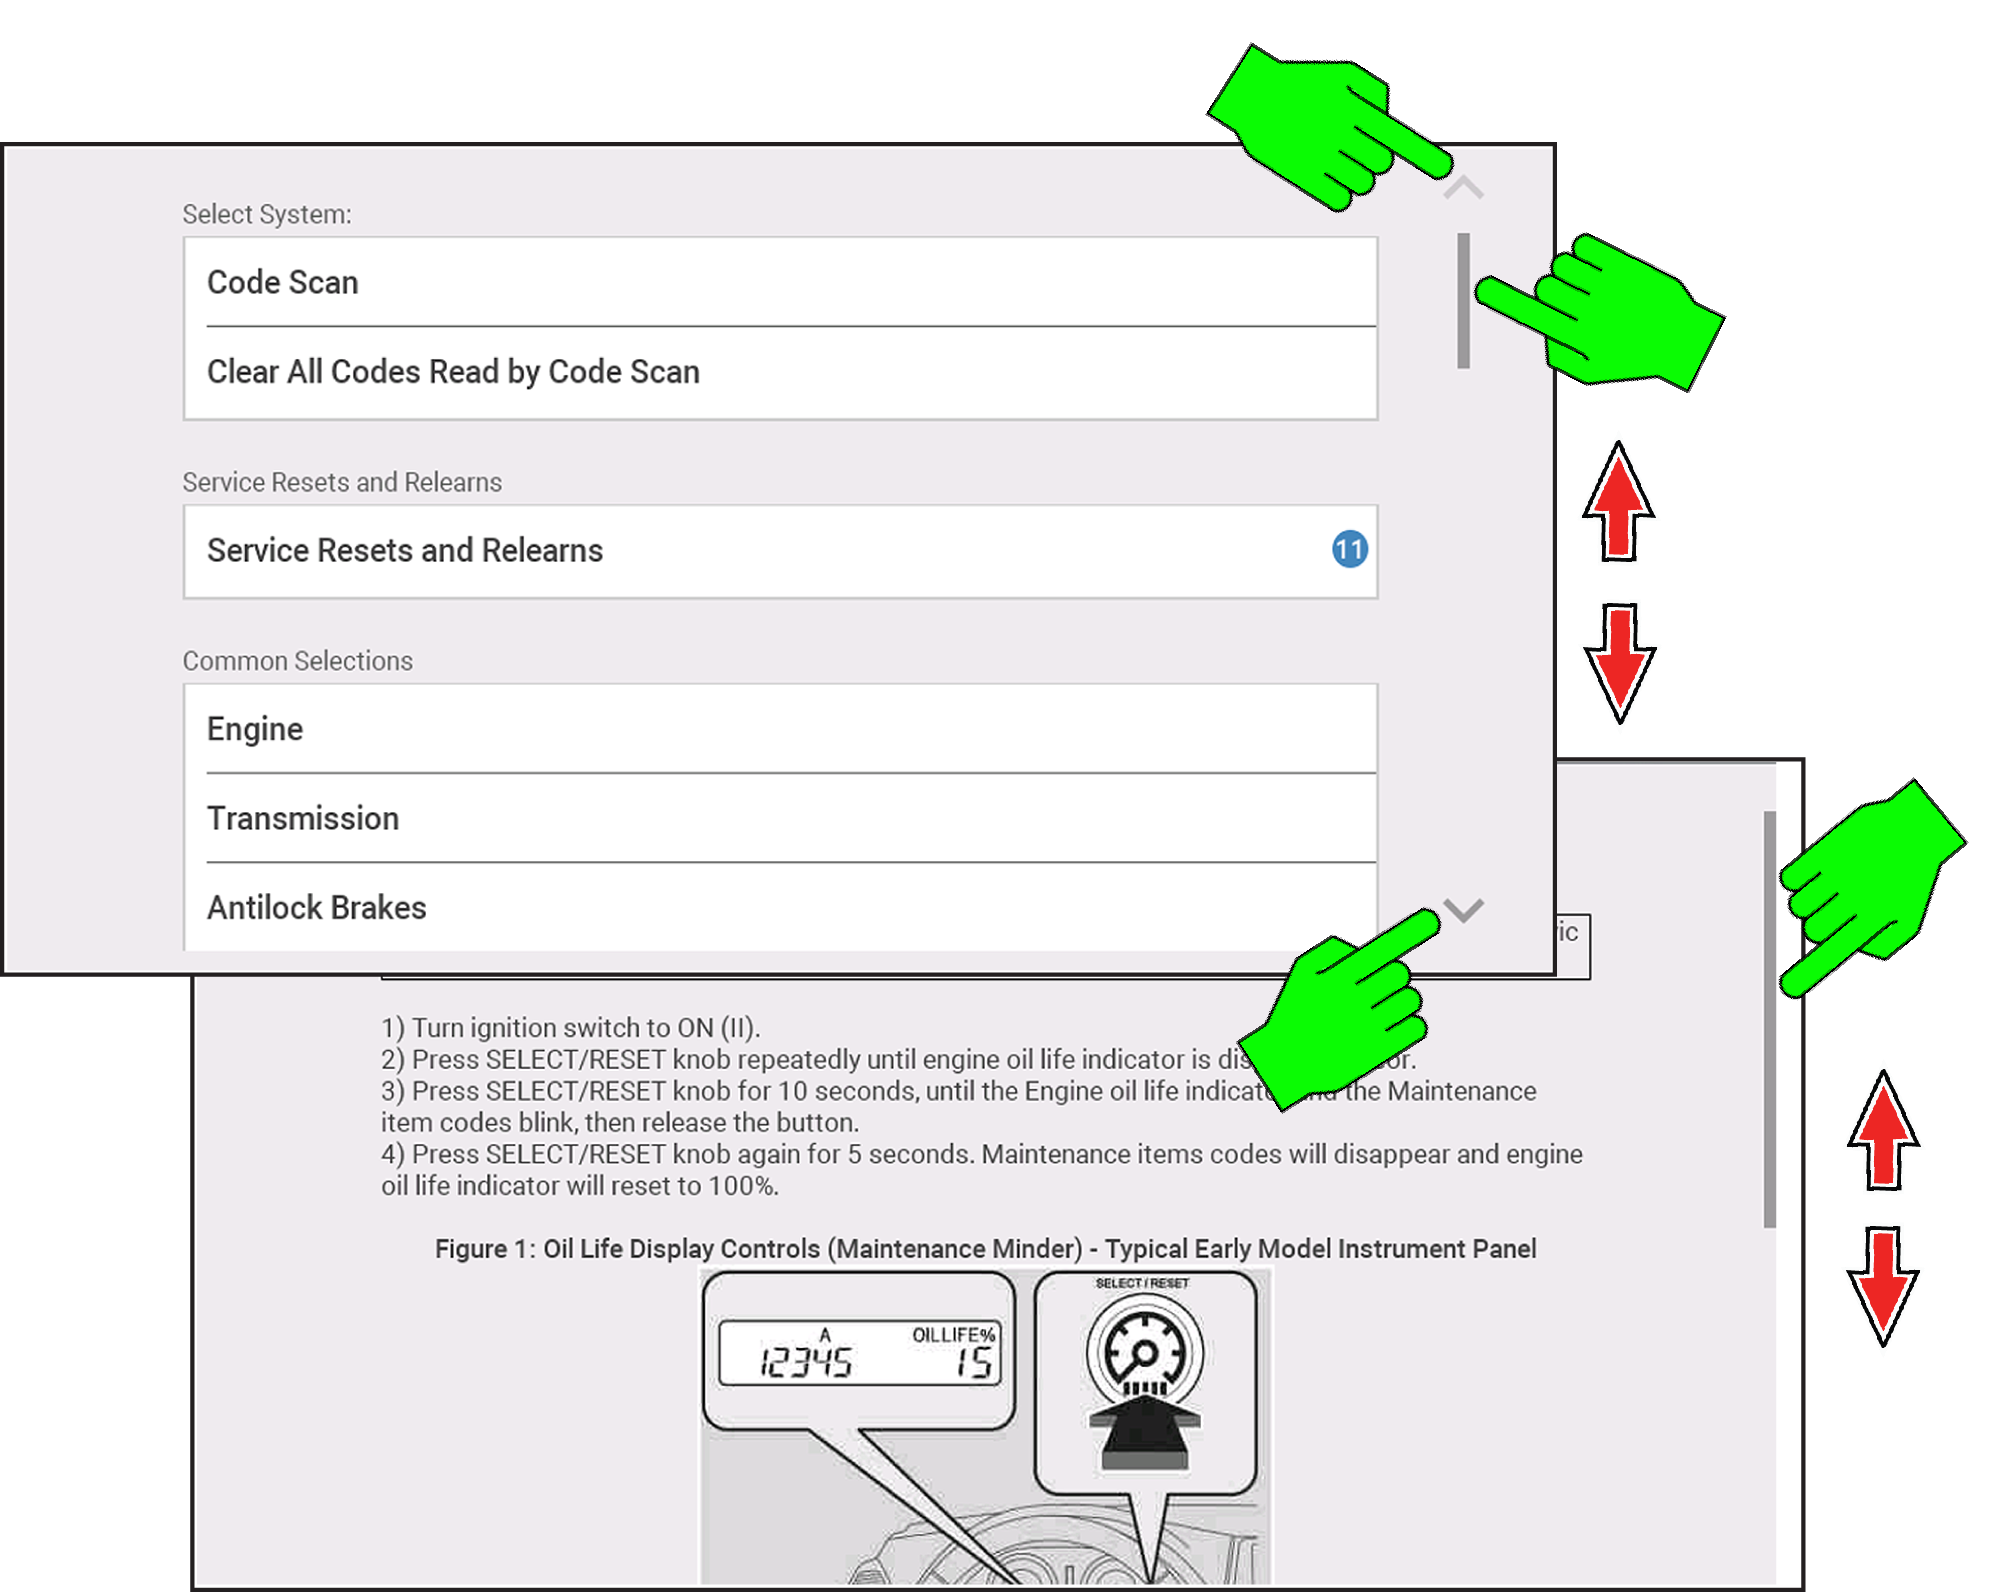
Onscreen scrolling controls are displayed (when applicable) to move screens up/down to view additional content. Scroll control icons display on the right-side of the screen, and may vary in appearance as shown below.
Multiple operation methods are:
| ● | Swipe up/down |
| ● | Swipe fast and release to coast |
| ● | Tap on the arrow icons to move by a page |
| ● | Press and hold the arrow icons to move to the end of the list |


